
Git Repository: https://github.com/danielBroadhurst/cloudformation_wordpress
Amazon CloudFormation makes it possible to deploy resources on Amazon Web Services (AWS). It allows you create complex infrastructure by using JSON or Yaml. CloudFormation permits you to specify in yaml all of the AWS resources that make up your infrastructure and handles creating and connecting them automatically.
A CloudFormation stack can manage a variety of things: DynamoDB tables, Elastic IPs, EC2 instances, Virtual Private Cloud networks and security groups, Route53 zones and records, IAM users, CloudWatch logs and alarms, S3 buckets, and much more. I wanted to see if I could deploy WordPress using CloudFormation and AWS Free Tier resources. The stack which is deployed uses an EC2 instance and a RDS instance with a MySQL database which is located in a VPC.
The template.yaml file which is in the repository contains all the resources which are required to deploy an instance of WordPress. The main resources which are deployed are made up of the following:
- VPC (Virtual Private Cloud) with 2 Subnets
- EC2 Instance – Free Tier Eligible
- RDS MySQL Database – Free Tier Eligible
There are many other elements such which are required to enable the deployment to work such as Security Groups, Route Tables, Network ACL’s and Gateways. The template requires a master password is created for the Database in the Systems Manager Parameter Store.
Creating a Database Password
To create the MySQL Master password I have used the AWS Systems Manager Parameter Store. The password can be resolved in the CloudFormation template, meaning that the password does not need to be stored in plain text on the template and in your repositiory. Another solution could be to use AWS Secrets Manager but this is a paid for service.

In the Systems Manager, click Parameter Store which will load a new screen in the console. Click the large orange button to create your parameter which then display the form. Enter the name for the parameter, this will be used in the template to resolve the value in the template. I chose to use a Standard parameter and used a SecureString which requires a KMS Key ID to encrypt the secret string. To generate a secure password I used the online random string generating website https://www.random.org/strings/ and added this to the value field on the form. You can also add any Tags to the parameter which can help identify groups of resources. The line in the template where the string is resolved is part of the AWS::RDS::DBInstance.
MasterUserPassword: '{{resolve:ssm-secure:wp-rds:1}}'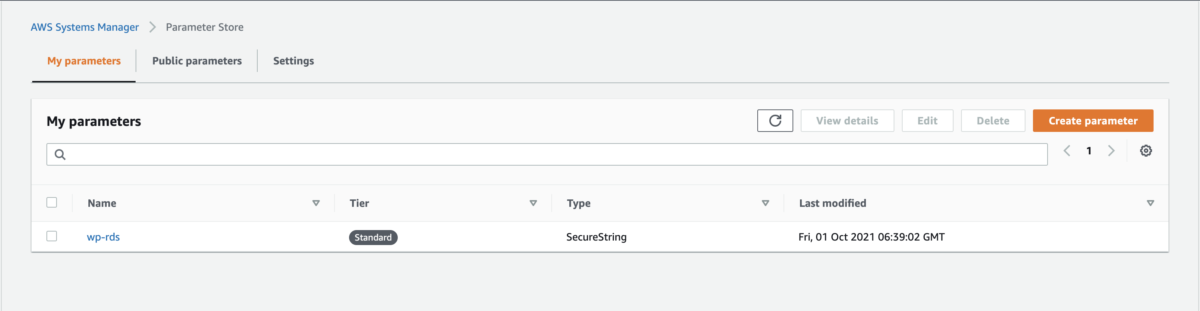
Deploying the WordPress Stack on AWS using CloudFormation
To deploy the stack to your AWS Account you will need the AWS CLI. The AWS Command Line Interface (CLI) is a unified tool to manage your AWS services. With just one tool to download and configure, you can control multiple AWS services from the command line and automate them through scripts. For more information on how to install the AWS CLI follow the steps in Amazon’s CLI Documentation.
Once your AWS CLI is installed and configured for use, you will need to have a terminal open in the directory where the template.yaml file is stored. The AWS CLI command to deploy the stack is:
aws cloudformation deploy --template-file template.yaml --stack-name <ENTER StackName> --capabilities CAPABILITY_NAMED_IAM --parameter-overrides DBName=<ENTER DB Name> DBUser=<ENTER DB UserName>The command tells the CLI tool to deploy a stack using the template.yaml file. There are a number of parameters which need to be passed into the command. DBName is the name of the database which will be created on the AWS RDS. DBUser is the name of the master user which will be added to the MySQL database when it loads up. These will be used later when you run the WordPress installation to enable the website to connect to the database. The StackName will be the name of the stack in your AWS account.
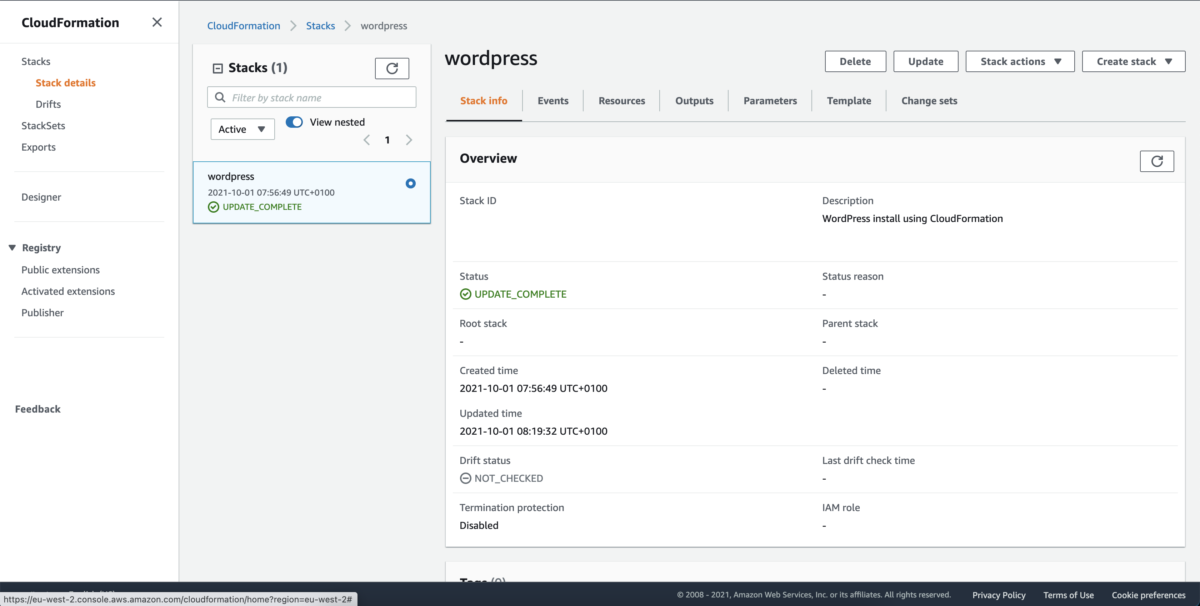
Once the command is run the stack will start to be created in your account. To deploy all the required resources can take around 20-30 minutes. Once the stack deployment has completed the CloudFormation screen in the AWS Console will display each of the resources and a list of events which occurred during the deployment.
The template.yaml file has an output section which will output values from the resources which are created:
Outputs:
  DBHost:
    Description: DB Instance Host Address
    Value: !GetAtt DBInstance.Endpoint.Address
    Export:
      Name: WordPressDBHost
  PublicURL:
    Description: Public URL of the EC2 Instance
    Value: !GetAtt LinuxEc2Instance.PublicDnsName
    Export:
      Name: WordPressBasePublicUrl
In the Output tab of the stack there will be 2 values, DBHost is the DNS URL which will be used during the WordPress install. PublicURL will be the URL which will now display the WordPress install screen. Please note that the template only deploys a HTTP version so the website will not be a secure site.
Installing WordPress
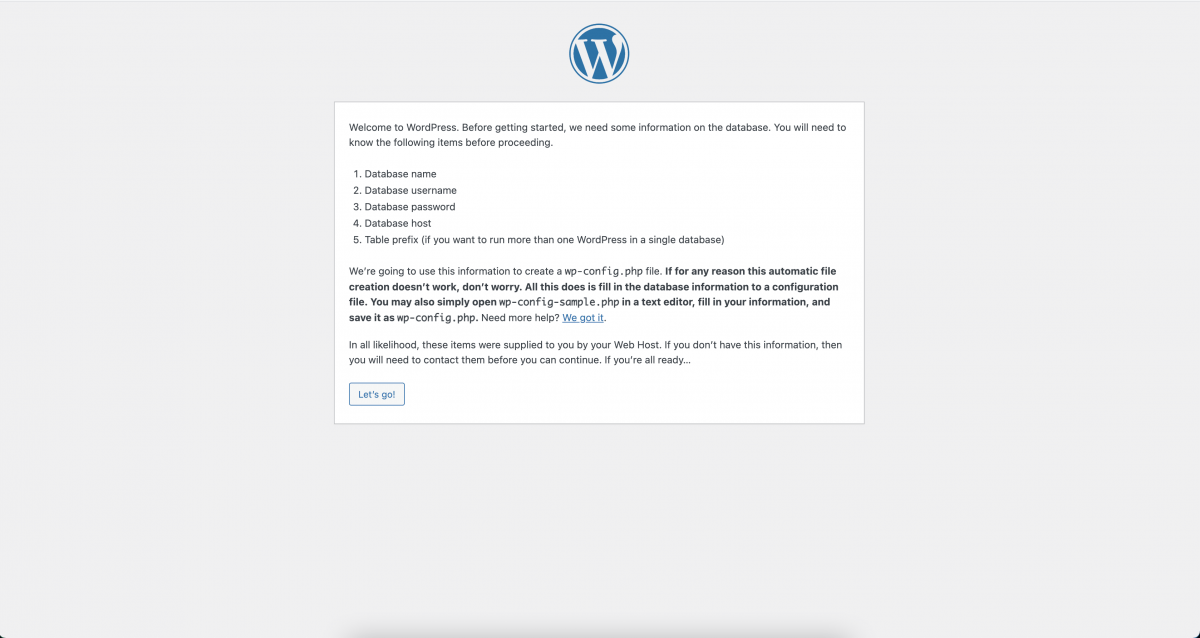
Once the stack has deployed WordPress needs to be installed by linking the website to the AWS RDS instance. To do this WordPress has an installation tool which can be used to add your Database credentials which are stored in the wp-config.php file. To start the process click the Let’s Go button.
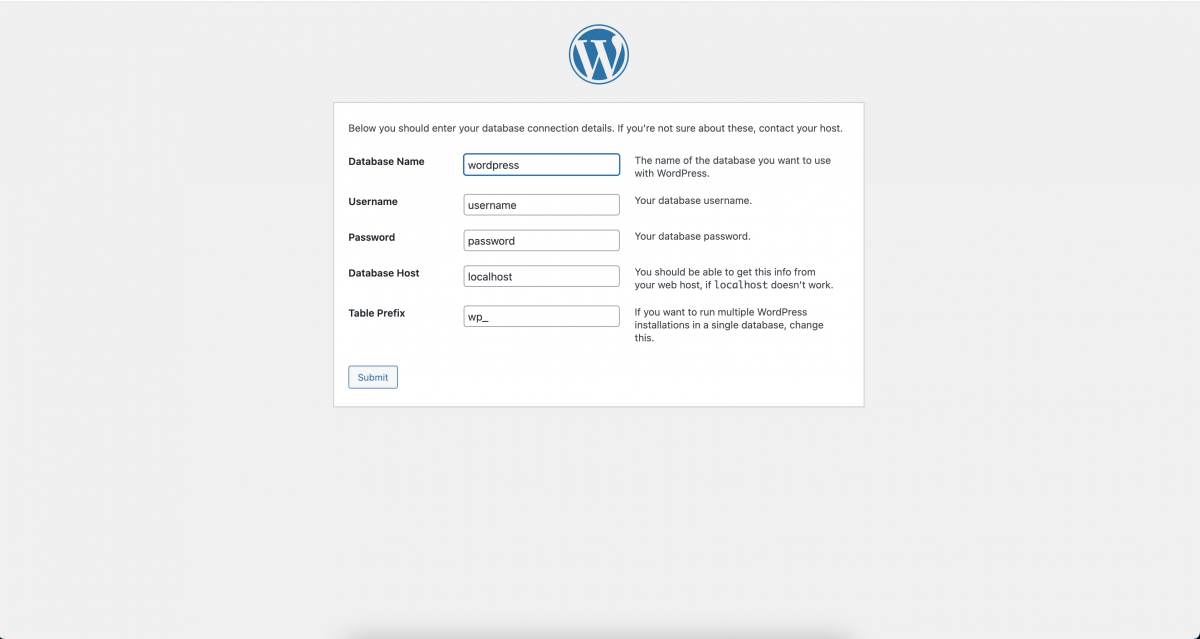
At this point you will need to add your credentials to enable the WordPress install to connect to your database. The Database Name will be the DBName value which was passed into the AWS CLI command. The Username will be the DBUser value which was also passed into the command to create the CloudFormation stack. Password will be the value which was used to create the AWS Systems Manager Parameter and finally the Database Host is the DBHost value from the outputs of the CloudFormation stack. The Table Prefix can be left as the default value or a value of your choosing. Submit the form and the installation will attempt to connect to the database, if this was successful you can then Run the Installation and move on to creating an Admin User and setting your Site Title.

Once you have created your site title and site admin, you will then be able to login to the WordPress admin dashboard and the website will be live.
Deleting the Resources on AWS
If you do not intend on keeping the website online and you have just followed this tutorial to see how the stack is deployed. You are able to delete all the resources in a click of a button which is a great feature and why I like to use CloudFormation to deploy resources on AWS.
In the CloudFormation dashboard you can select the stack and simply click on the Delete button. This will take some time as it will have to take down the EC2 and RDS instances and remove all the other resources which are created.